 Welcome to part 2 of Build Your Own BMO. In the first part we discussed the display which is a cannibalized digital picture frame. In this part we will go over the design and construction of BMO’s case.
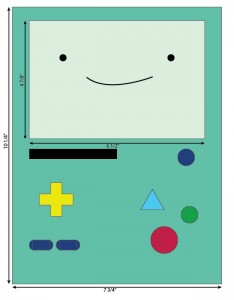
Using an 8” display you can construct a case that is a bit small than an 8 1/2” x11” piece of paper. This is convenient for two reasons. One, it makes him easy to carry around. Two, the plans can be printed on paper and used as a cutting and drilling template.
BMO is built out of ¼” MDF (Medium Density Fiberboard). MDF is easy to glue, shape and cut, plus it seals very easily and can be coated to look like metal.
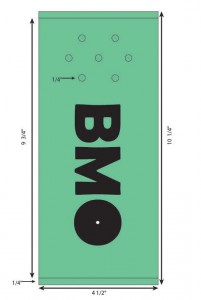
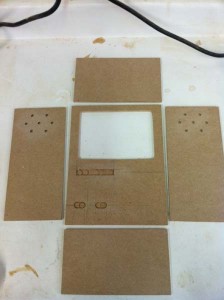
I designed the front and side templates using Adobe Illustrator. Once everything looked right (BMO can vary depending on what pictures you find of him) I printed the templates and cut the pieces. The opening for the display was cut by first drilling the corners with a ½” bit and then using a router to make the straight cuts. A hand held coping saw would probably work too.
The side panel has 1/4″ holes drilled in it for venting, or at least I assume those are for venting. But they are usefull since the display does put of a little bit of heat.
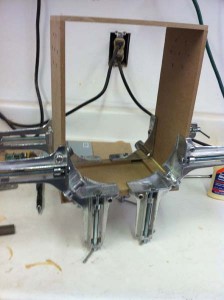
Once the pieces are cut it’s just a matter of gluing the together. I used standard wood glue and some corner clamps to keep everything square. Some additional shims were added to the corners for reinforcement. The face front is then glued on since it doesn’t need to be removed. The back will be screwed on so it can be removed to access the batteries and SD card. BMO’s gamecard slot and controller ports are recessed slightly.
The front and back panels should be slightly oversized. This will allow you to sand them down once the case is assembled and you will have no visible seems. If you use a lot of glue you shouldn’t need any filler for the seams but you can add filler where needed.
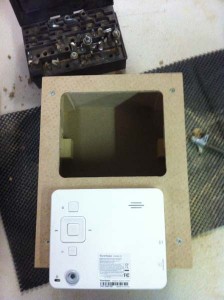
I cut the control panel off of the back of the digital frame. The control PCB unscrews from the frame but it’s more convenient to keep it because it already has the buttons you need to power and navigation. It’s just a matter of cutting a space for it in the back panel. I used did this the same way I cut the space for the display, with a drill and router. The controls are just glued to the MDF using epoxy.
That covers BMO’s case. Next we will talk about the finishing details and painting.
Stay tuned…

omg i just want to bye one you know
Do you mean buy?
Yes
i really want to by one for my friend dose anyone know were i can get one.
Will you please make a new tutorial for how to make the BMO 2.0 and BMO 3.0 (and how to code/program/get(the raspberry pi to get) the BMO with games like the guardians of sunshine) Please
Question what type of controll PCB did you use?
omg this is so cool!